Firmware Updates
Samsung 980Pro NVMe
wget https://semiconductor.samsung.com/resources/software-resources/Samsung_SSD_980_PRO_5B2QGXA7.iso
apt-get -y install gzip unzip wget cpio
mkdir /mnt/iso
sudo mount -o loop ./Samsung_SSD_980_PRO_5B2QGXA7.iso /mnt/iso/
mkdir /tmp/fwupdate
cd /tmp/fwupdate
gzip -dc /mnt/iso/initrd | cpio -idv --no-absolute-filenames
cd root/fumagician/
sudo ./fumagician
This .iso is for 980 Pro, if you have different model replace ISO with link on https://semiconductor.samsung.com/consumer-storage/support/tools/
ASRock Rack Motherboard
This guide outlines the steps to update the firmware on your ASRock Rack motherboard. The update includes the BIOS, BMC (Baseboard Management Controller), and the networking firmware.
Before starting, download the following files:
BIOS Update
ASRock Rack provides a BIOS flash utility called ASRock Rack Instant Flash, embedded in the Flash ROM, to make the BIOS update process simple and straightforward.
-
Preparation: Format a USB flash drive with FAT32/16/12 file system and save the new BIOS file to your USB flash drive.
-
Access ASRock Rack Instant Flash: Restart the server and press the
<F6>key during the POST or the<F2>key to enter the BIOS setup menu. From there, access the ASRock Rack Instant Flash utility. -
Update BIOS: Follow the instructions provided by the utility to update the BIOS.
BMC Firmware Update
In order to keep your BMC firmware up-to-date and have the latest features and improvements, regular updates are recommended. This guide provides step-by-step instructions on how to update your BMC firmware.
-
Preparation: Download the correct BMC firmware update file from the ASRock Rack website. Ensure the firmware version is later than the one currently installed on your device. Save the firmware file on your local system.
-
Access BMC Maintenance Portal: Open your web browser and navigate to the BMC maintenance portal using the IP address of the BMC. Typically, the URL is https://[BMC IP Address]/#maintenance/firmware_update_wizard, for instance, https://192.168.33.114/#maintenance/firmware_update_wizard.
-
Login: Use your BMC username and password to log into the portal.
-
Firmware Update Section: Navigate to the firmware update section.
-
Upload Firmware Image: Click on "Select Firmware Image" and upload the firmware file you downloaded earlier. The firmware files typically end with
.ima. For instance,B650D4U_2L2T_4.01.00.ima. -
Preserve Configuration: If you want to preserve all the current configurations during the update, check the box "Preserve all Configuration". This will maintain all the settings irrespective of the individual items marked as preserve/overwrite in the table below.
-
Start Update: Click "Firmware Update". The system will validate the image and if successful, the update process will start. The progress will be shown on the screen.
-
Reboot: Once the update is completed, the system will reboot automatically.
WARNING: Please note that after entering the update mode, other web pages, widgets, and services will not work. All the open widgets will be automatically closed. If the update is cancelled in the middle of the process, the device will be reset only for BMC BOOT, and APP components of Firmware.
NOTE: The IP address used in this guide is an example. Replace it with the actual IP address of your BMC. Also, remember to use a reliable network connection during the update process to prevent any interruption.
Networking Firmware Update
-
Preparation: Format a USB flash drive and copy the "bnxtmt-lite-uefi-221.0.117.0-x64" folder from the downloaded Broadcom 57416 LAN Flashing Firmware onto it.
-
Access UEFI Shell: Insert the USB flash drive into your ASRock Rack server board, reboot the server, and hit F11 at the POST screen. Select "UEFI: Built-in EFI Shell". The USB flash drive should be named
FS0:. TypeFS0:and press enter.
-
Verify Current Firmware Version: Execute
bnxtmt.efito display the current firmware version.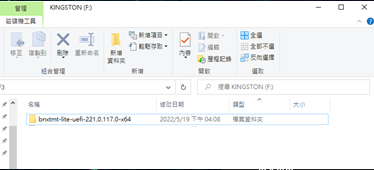
-
Erase the Flash: Navigate to the "bnxtmt-lite-uefi-221.0.117.0-x64" folder and execute
bnxtmt.efi -sysop -none -no_swap –blankto erase the current firmware.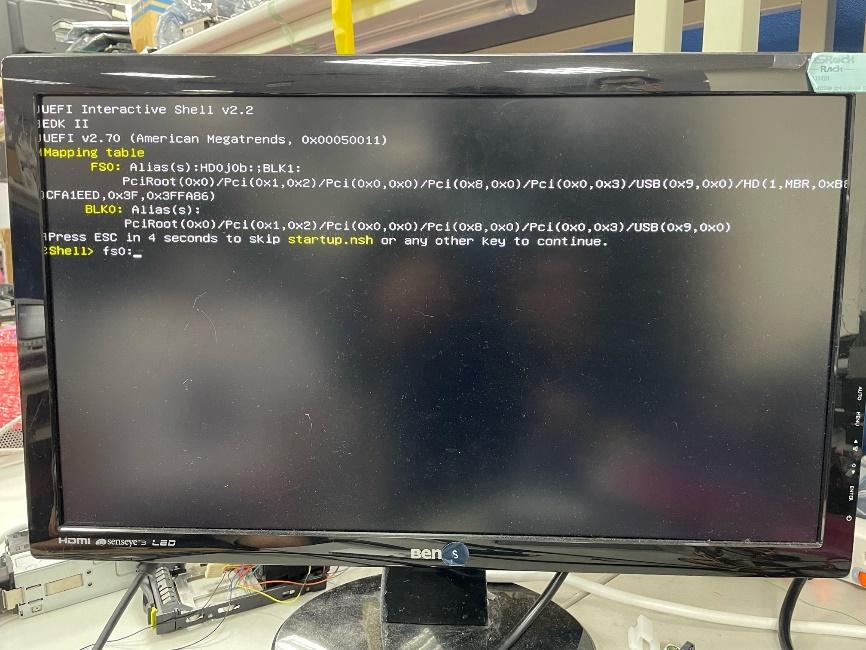
-
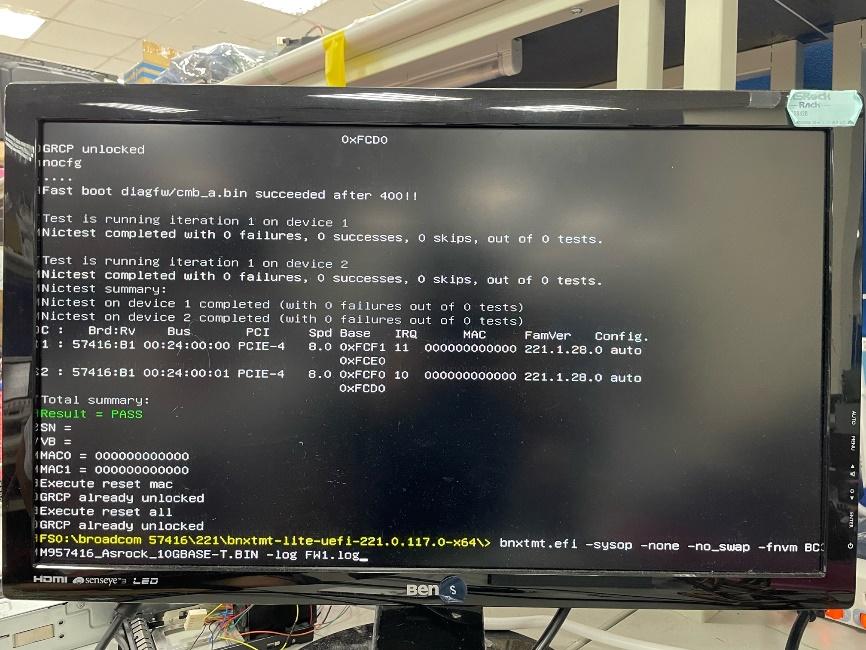
Flash the Firmware: Execute
bnxtmt.efi -sysop -none -no_swap -fnvm ASRR57416-2T.PKG -log FW1.logto flash the new firmware. Here,ASRR57416-2T.PKGis the firmware file.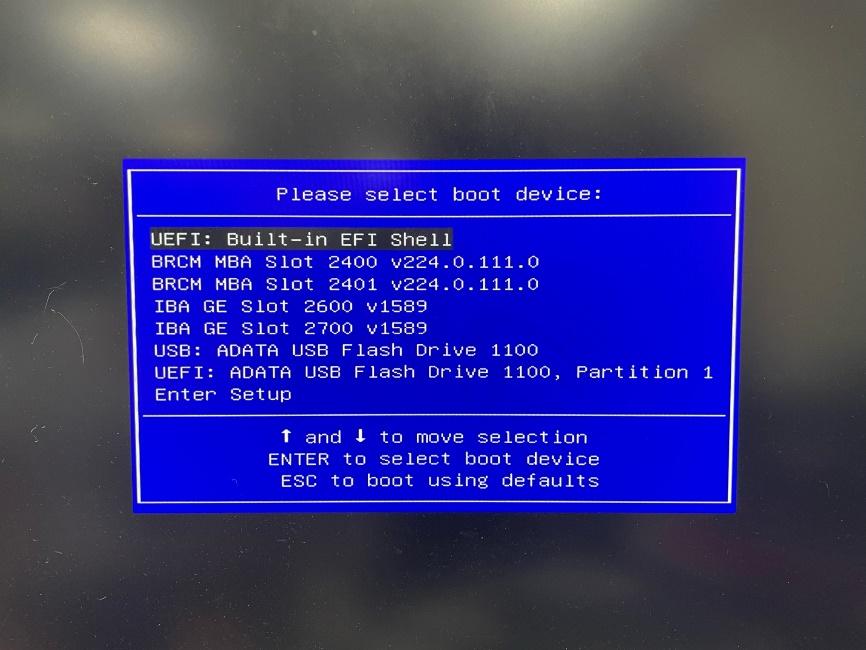
-
Verify Updated Firmware Version: Run
bnxtmt.efiagain to verify the new firmware version.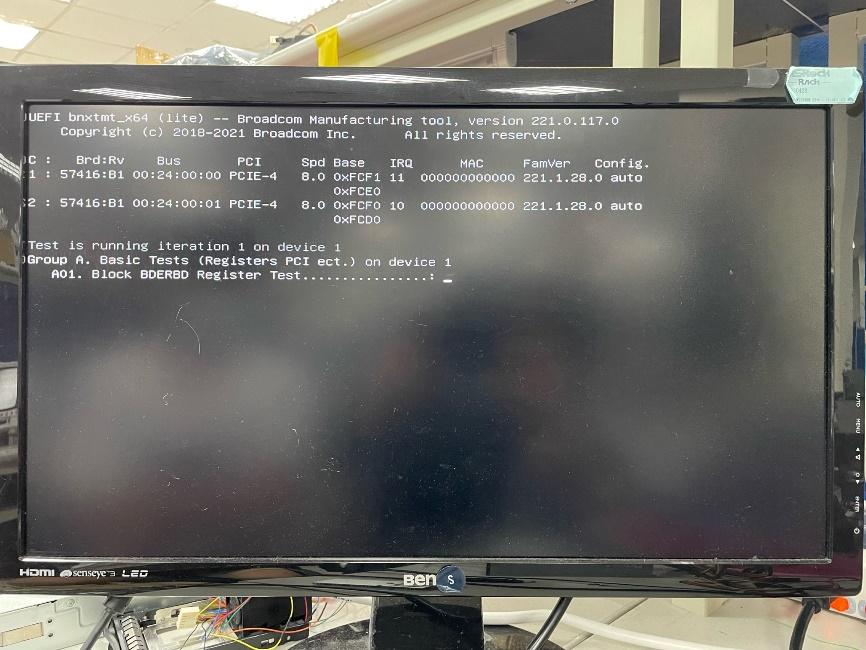
-
Flash LAN Ports' MAC Addresses: Execute
bnxtmt.efi -none –m -log MAC1.log.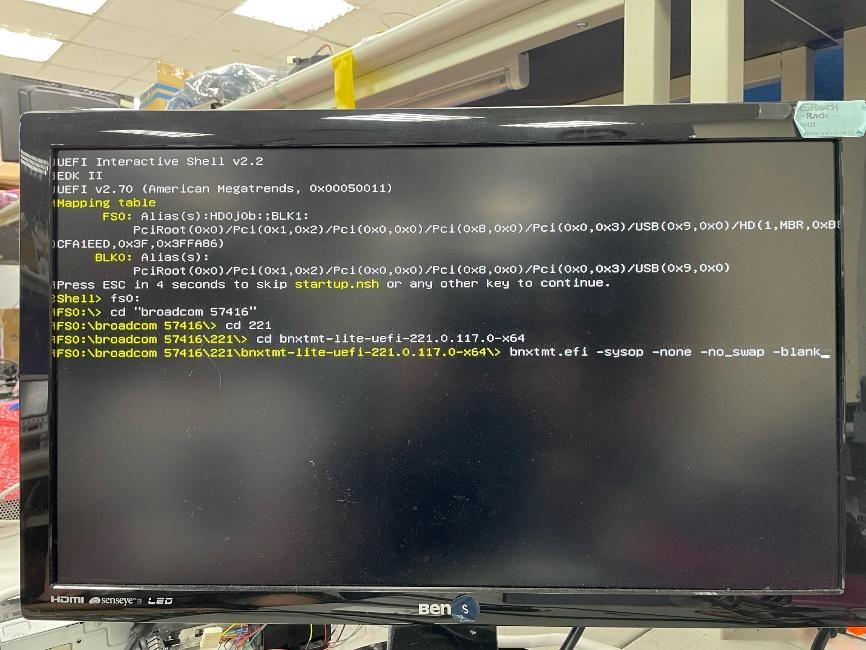
-
Input MAC Addresses: Enter the MAC addresses of both LAN ports when prompted. Write down these addresses beforehand.
-
Power Cycle: Turn off the system, power cycle the PSU, and then power everything back on.
Note: The MAC addresses for your LAN ports are crucial. Write them down before starting the update process as they need to be added during the command at step 8.